Maintaining our hair tools might not be at the top of our to-do list, but trust me, it’s a game-changer.
You see, just like how we clean our makeup brushes for flawless makeup, our hair tools deserve some love too.
Curling irons and flat irons, those trusty styling sidekicks, often end up in a sticky situation, thanks to all the hair products we throw their way.
Flat irons are fantastic for achieving that sleek and smooth look for your hair. These trusty tools have been a go-to for ages, but here’s the deal – using them right is key to avoiding hair damage.
Now, while it’s ideal to give your hair a break from the heat, we get it – not everyone wants to do that. So, if you’re in for some straightening action, just remember not to overdo it. It’s all about finding that balance.
In this article, we’ll show you the ropes of keeping your curling and flat irons in tip-top shape.
Not only will your styling game reach new heights, but you’ll also extend the life of your beloved hair tools.
So, if you’re tired of the gunk and ready to know how to clean a flat iron hair straightener, read on.
Why Do You Need To Clean Your Flat Iron?
Cleaning your flat iron is essential for a couple of crucial reasons. First off, product residues like heat protectants, hairsprays, and oils can build up on the plates.
Over time, these residues can become baked onto the surface, leading to discoloration and even corrosion. This can affect the flat iron’s performance and lead to hair snagging, breakage, or the need for repetitive passes, which isn’t great for your hair.
But that’s not all.
When you use a flat iron covered in these sticky residues, there’s a risk that they could heat up to higher temperatures than the plates themselves. This can result in unintentional hair damage or even singing.
Plus, let’s not forget the hygiene aspect.
Sometimes, those product residues can become a cozy home for bacteria, and you definitely don’t want that near your hair.
So finally, how to clean a flat iron at home isn’t just about keeping it looking good; it’s about maintaining its performance, ensuring hair safety, and promoting good hygiene. It’s a win-win for both your styling routine and your precious locks!
How Often You Should Be Cleaning Your Flat Iron?
So, your flat iron plays a pivotal role in maintaining both its performance and the health of your hair. Think of it as giving your trusty styling sidekick a little spa day – it deserves some TLC too!
For those who wield their flat iron daily or several times a week, it’s a good practice to clean it every 1 to 2 weeks.
Why so often, you ask?
Well, the more you use it, the more likely it is to accumulate those sneaky residues from your hair products. These can cling to the iron’s plates, creating a layer that not only affects its appearance but also its functionality.
Now, if you’re more of an occasional user, giving your flat iron a monthly cleaning should do the trick. But here’s the catch: don’t rely solely on a schedule. Keep an eye out for signs that it’s crying out for a clean slate.
One glaring signal is visible residue. If you spot any gunk or discoloration on those plates, it’s a clear indicator that your flat iron is due for a cleanup. It’s not just about aesthetics; this buildup can hinder the smooth glide of the plates, causing your hair to snag and even break.
Ouch!
Another telltale sign is performance-related. If your flat iron suddenly isn’t doing its job as smoothly or evenly as it used to, that’s your cue. A good scoop to clean a flat iron steak can often restore its glory.
Let’s not forget those unpleasant smells. If you fire up your flat iron, and it emits strange odors that have nothing to do with your hair products, it’s a sign that something’s amiss. Cleaning it might help banish those unwanted scents.
Remember, these guidelines are a helpful starting point, but your unique usage and hair products might require adjustments. Regular cleaning isn’t just about keeping up appearances; it’s about ensuring your flat iron delivers its best performance while keeping your hair happy and healthy.
So, don’t skimp on the cleaning – your locks will thank you for it.
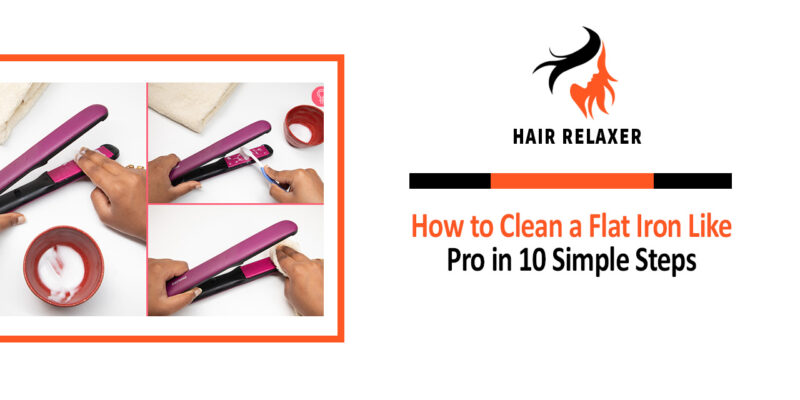
How to Clean a Flat Iron Like Pro in 10 Steps
Cleaning your hair tool is a simple yet essential task to ensure its longevity and maintain the health of your hair.
Here’s a detailed, step-by-step guide on the ten best ways to clean flat iron plates effectively.
Step 1: Safety First
Before you start proper cleaning, always prioritize safety. Unplug your flat iron and allow it to cool down completely. Cleaning a hot appliance is a no-go.
Step 2: Gather Your Supplies
Collect the necessary cleaning supplies: cotton balls or swabs, a soft cloth, baking soda, white vinegar, a small bowl, and access to running water.
Step 3: Wipe Down the Plates
Begin by using a soft cloth or a paper towel to wipe away any loose debris or visible residue on the flat iron plates. This initial wipe helps clear away the surface clutter.
Step 4: Create a Cleaning Paste
In a small bowl, mix equal parts of baking soda and white vinegar to create a paste. This dynamic duo is excellent at breaking down stubborn product residue.
Step 5: Apply the Paste
Spread the paste evenly on the flat iron plates, ensuring full coverage. Be patient and let it sit for approximately 10 to 15 minutes. During this time, the paste will work its magic.
Step 6: Gently Scrub
After the paste has had time to work, use a cotton ball or swab to gently scrub the plates. This action will help dislodge and remove the buildup effectively.
Step 7: Rinse Thoroughly
Dampen another cloth or cotton ball with water and use it to wipe off the paste from the plates. Ensure that you clean every nook and cranny, leaving no residue behind.
Step 8: Dry It Off
Take a dry cloth and thoroughly wipe the plates until they are completely dry. Moisture on the plates can be damaging and counterproductive.
Step 9: Don’t Forget the Exterior
While you’re at it, don’t neglect the flat iron’s exterior. Use a damp cloth to clean it, and then dry it with a separate cloth to ensure it’s pristine.
Step 10: Final Inspection
Finally, plug your flat iron back in and heat it for a few seconds. This step is to ensure that there’s no lingering residue or unusual smells. If you detect any, repeat the cleaning process.
By following these ten meticulous steps, you’ll not only keep your flat iron in tip-top condition but also guarantee that your hair styling remains fabulous and free from unwanted residue or odors.
Regular maintenance ensures your flat iron remains your trusty styling companion for a long time to come.
When to Replace Your Flat Iron?
Knowing when it’s time to bid farewell to your flat iron is crucial for both the safety of your hair and maintaining effective styling.
Here are some key indicators that it might be time to replace your flat iron:
Reduced Performance
If your flat iron no longer heats up as quickly or evenly as it used to, and you find yourself needing more passes to achieve the desired result, it could be a sign that the heating element is failing.
Damaged Plates
Check the plates for visible damage, such as cracks, chips, or warping. Damaged plates can snag and break your hair, making it unsafe for use.
Excessive Wear and Tear
If your flat iron shows signs of significant wear, such as peeling or chipping of the exterior, exposed wires, or a loose hinge, it’s time to consider a replacement for safety reasons.
Unpleasant Smells
If your flat iron emits unusual or unpleasant odors when heated, it could indicate that the internal components are deteriorating, which is not only bad for your hair but potentially hazardous.
Frequent Repairs
If you find yourself repeatedly repairing your flat iron, it might be more cost-effective and safer to invest in a new one. Frequent repairs can be a sign of an aging or low-quality flat iron.
Outdated Technology
Advancements in flat iron technology continually improve safety and performance. If your flat iron lacks features like adjustable temperature settings or automatic shut-off, upgrading to a more modern model can be a wise choice.
Burn Marks or Stains
Burn marks or stubborn stains on the plates can indicate product residue buildup that’s difficult to remove. This residue can affect the flatiron’s performance and the health of your hair.
Excessive Hair Damage
If you’ve noticed that your hair has become more damaged or prone to breakage despite proper care, it could be due to an old or low-quality flat iron that doesn’t distribute heat evenly or has damaged plates.
Ultimately, the lifespan of a flat iron can vary depending on its quality, usage frequency, maintenance, and the way to clean a flat iron griddle. When you start encountering one or more of these warning signs, it’s a good idea to consider investing in a new flat iron.
A high-quality replacement will not only deliver better results but also ensure the safety and health of your hair.
How to Clean a Flat Iron? – FAQs
Conclusion
In conclusion, maintaining a clean flat iron is not just about aesthetics; it’s a crucial practice to ensure the longevity of your trusty styling tool and the health of your hair. The process we’ve discussed in this article offers a simple yet effective way to keep your flat iron in perfect shape.
By regularly cleaning your flat iron, you prevent product residues from accumulating on the plates, which can hinder its performance and even damage your hair. Moreover, a clean flat iron operates smoothly, ensuring you achieve the sleek, flawless hairstyles you desire.
Remember, the frequency of cleaning depends on your usage and the hair products you employ. Whether you’re a daily user or an occasional styler, incorporating cleaning into your routine is a small effort with significant benefits.
So, don’t overlook the importance of this maintenance task about how to clean a flat iron for hair. Treat your flat iron to the occasional spa day with baking soda and vinegar or specialized cleaning products.
Your hair and your flat iron will thank you with dazzling, damage-free styling sessions. With a clean flat iron in hand, you’re ready to conquer any hairstyle and flaunt your locks with confidence and style.